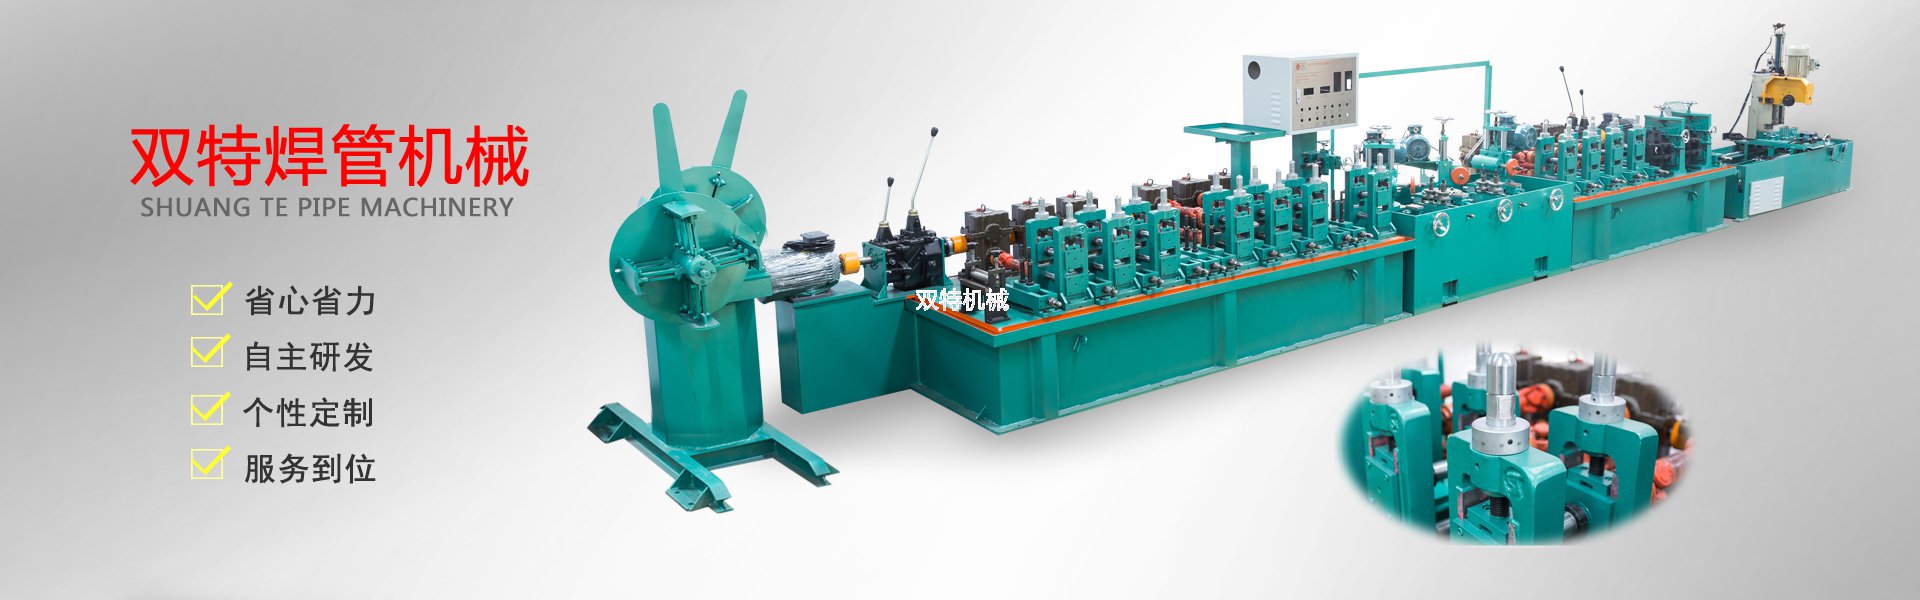
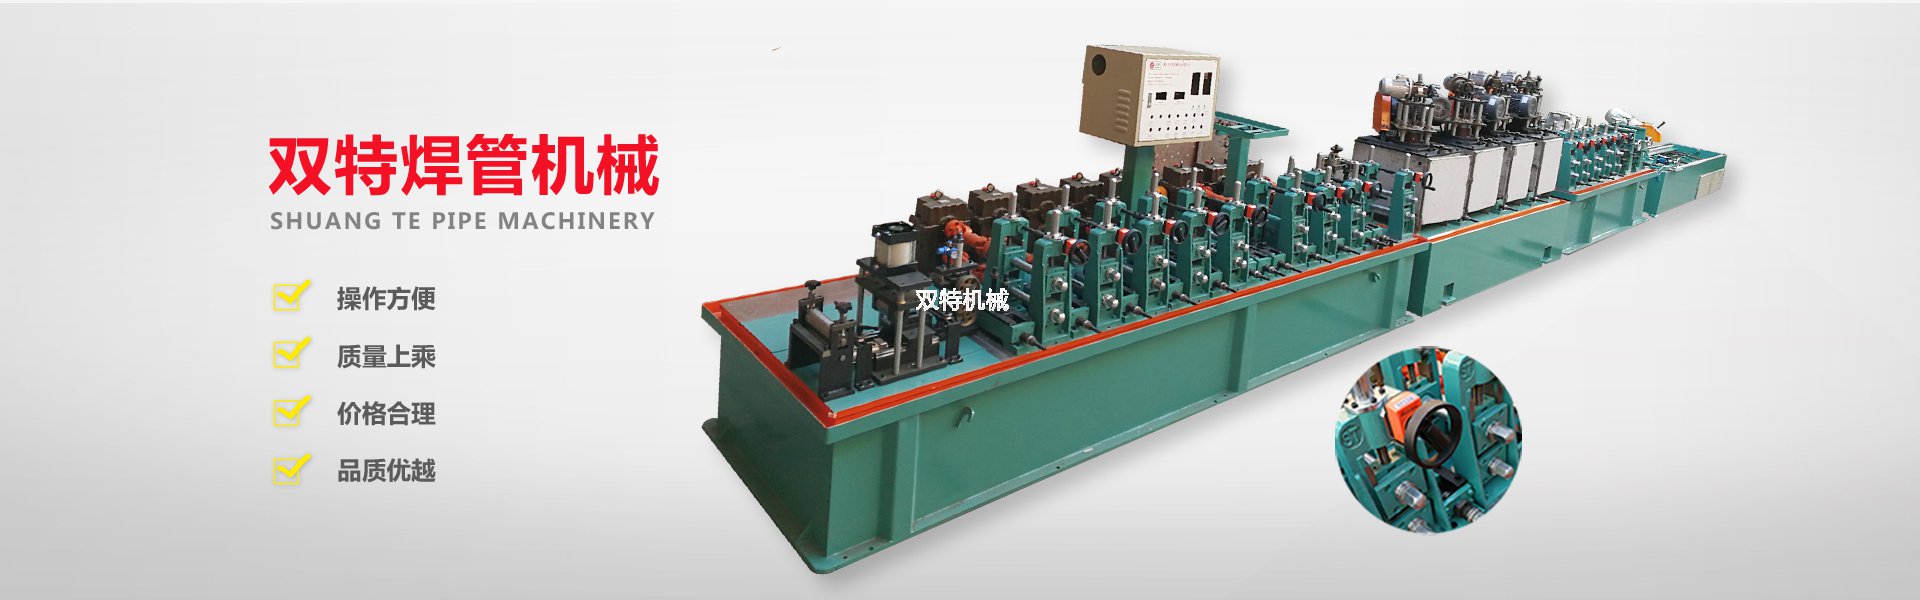
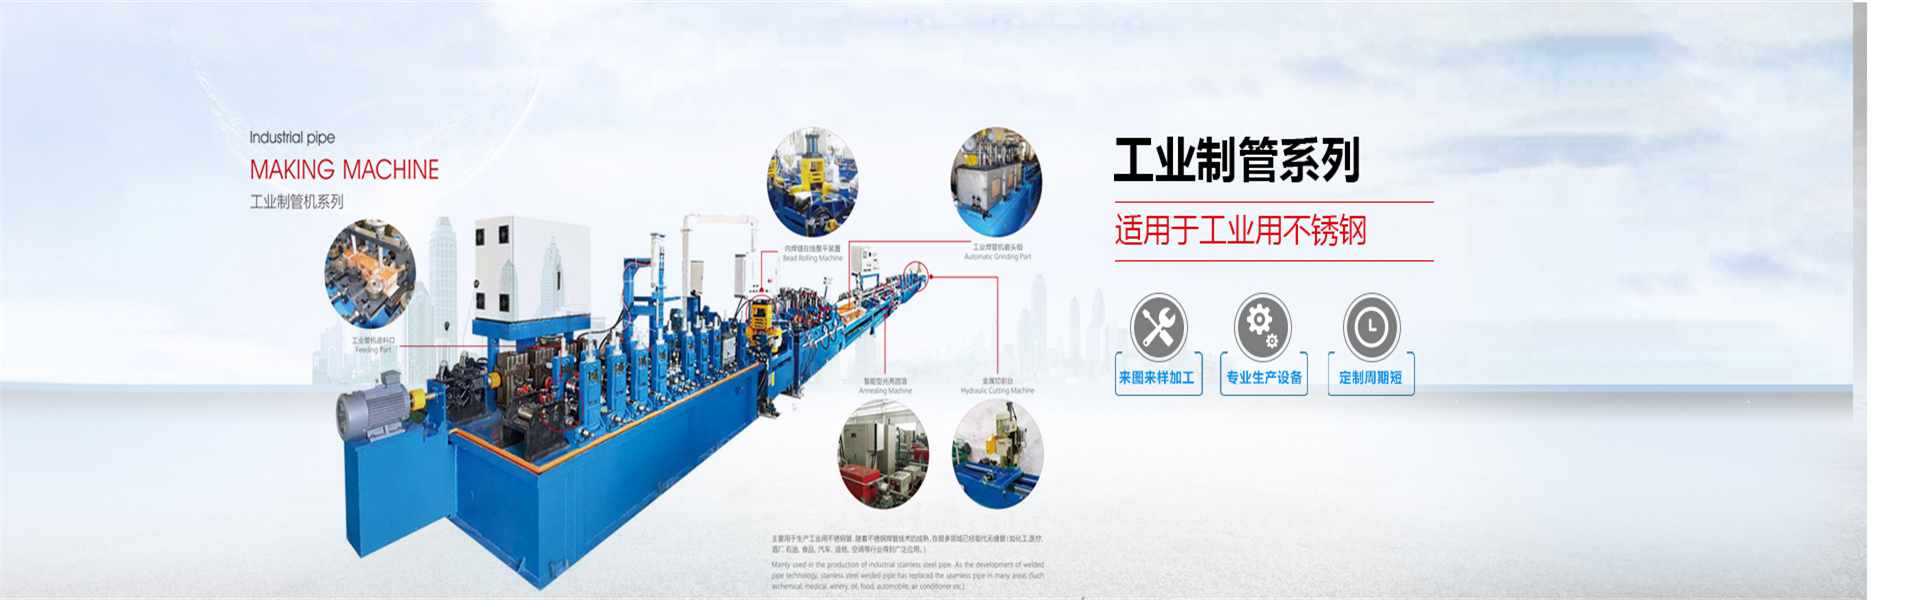
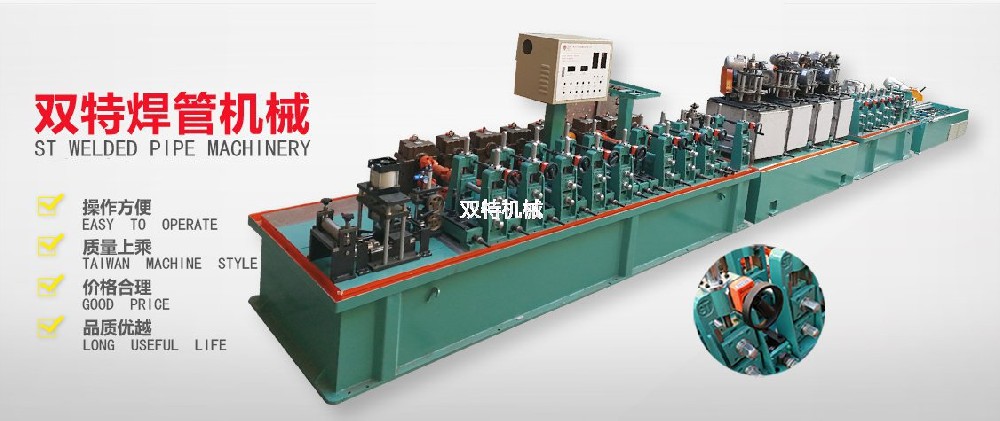
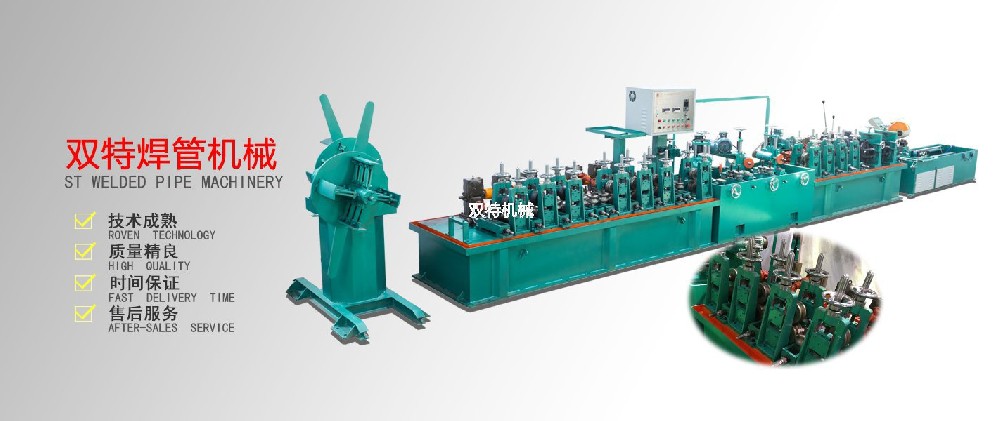
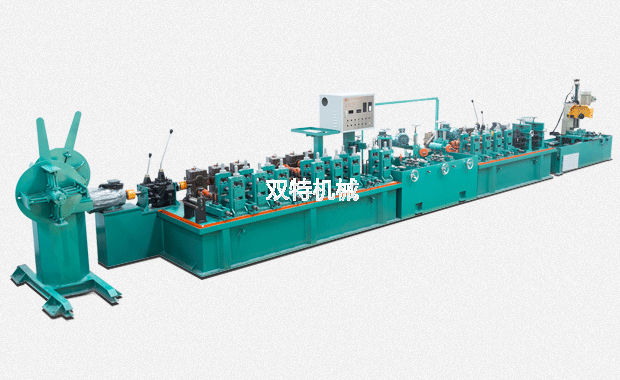
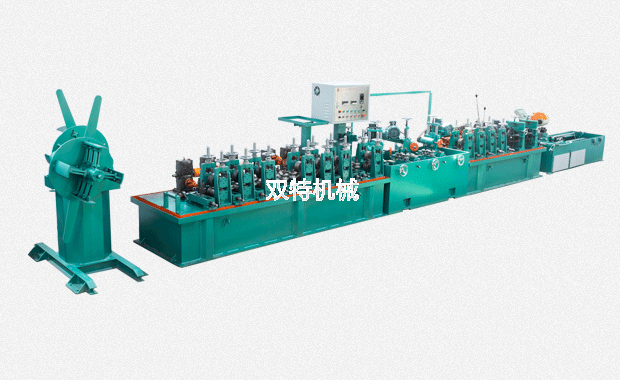
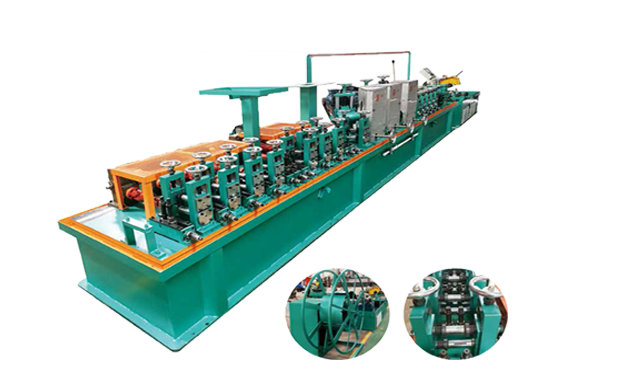
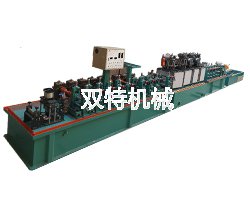
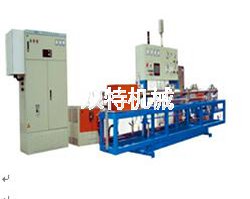
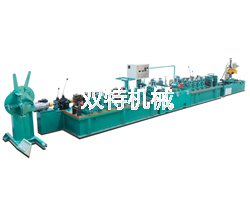
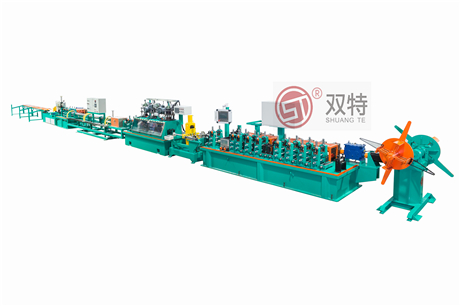
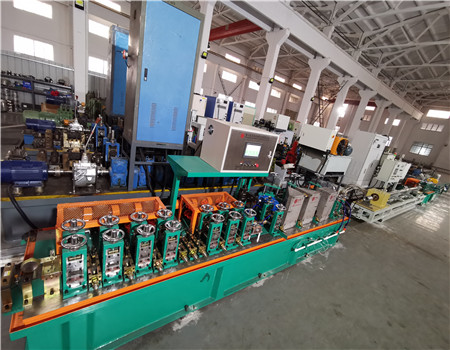
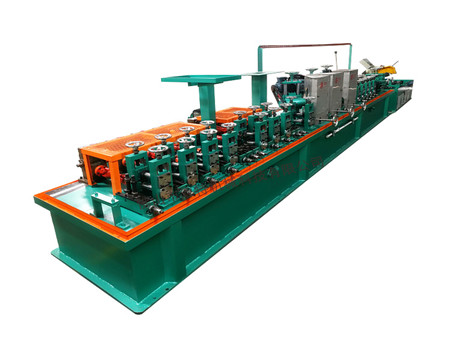
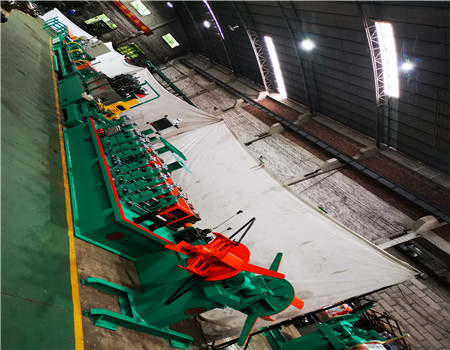
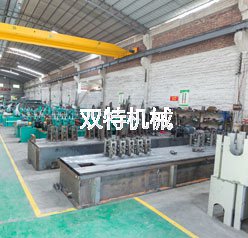
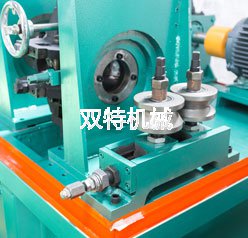
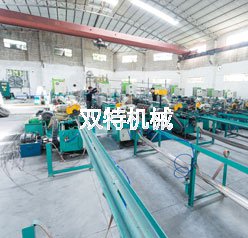
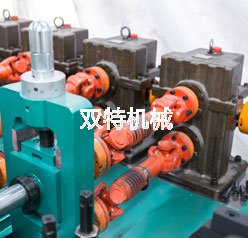
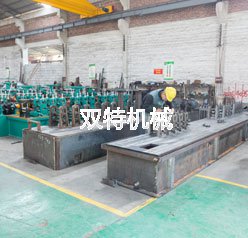
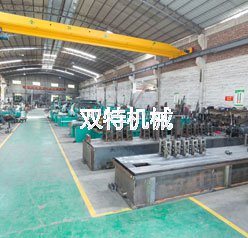
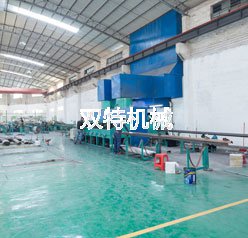
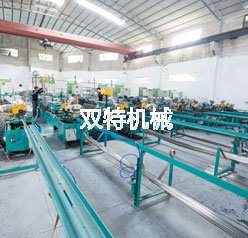
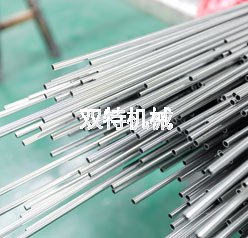
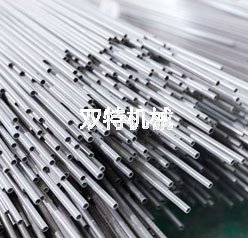
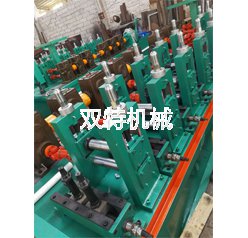
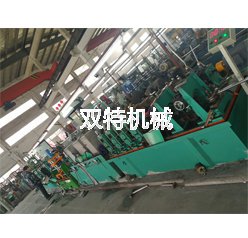
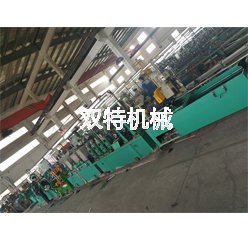
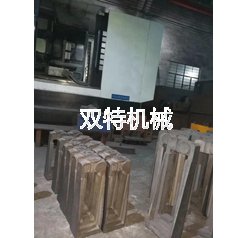
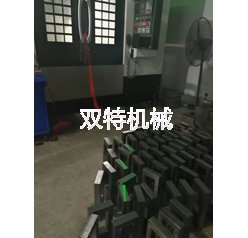
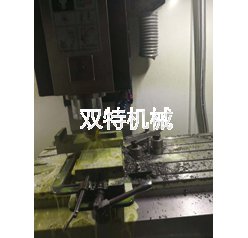
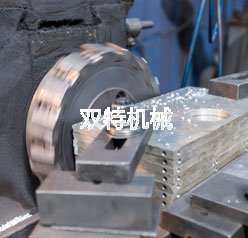
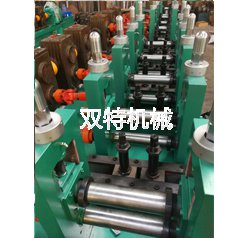
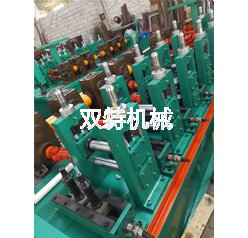
Jeff McRitchie asked:
This article is designed to help you troubleshoot some of the most common issues that users face when using the Fastback Foilfast printer. The article will provide you with several common problems and potential solutions. Unfortunately the list is not extensive. However, it should give you a good start in tracking down issues with your printer.
Problem #1: Cartridge is stuck in the carriage
1. Turn off the power.
2. Open the front cover and remove all cartridges on the cartridge holder plates.
3. Close the front cover, and turn on the power. The carriage will reset.
Problem #2: Power does not come on
1. Check to make sure the power cord is connected
2. Make sure the power cord is plugged into an outlet as well as connected to the printer. After checking the power cord, push the power button to turn on the printer. Is the printer plugged into an extension block or power strip?
3. After turning on the extension block or power strip, press the power button on the printer.
Problem #3: Printing is light, distorted, or has gaps
1. Stop the printing and reinstall all the cartridges. Take up any slack in the foils. If a particular cartridge repeatedly causes problems, try a different cartridge.
2. Clean the printer head. The platen often gets dirty at the same time as the head, so it is recommended to clean the platen after cleaning the head.
3. Clean the platen. If anything is stuck to the platen, remove it, being careful not to damage the platen. The platen often gets dirty at the same time as the head so it is recommended to clean the platen as well as the head. If cleaning the head and the platen does not work, contact your authorized Fastback dealer for assistance.
Problem #4: Printer does not print or stops while printing
1. Before printing make sure the printer is turned on.
2. Make sure that the front cover is closed properly.
3. Press the ready/insert button and make sure that the ready light comes on.
4. After connecting the cable, make sure nothing is putting pressure on the cable, and tighten the fastening screws and clamps to secure the cable.
5. Remove the sheet. If the sheet is caught in the rollers, open the front cover, push down on the release lever, and gently remove the sheet.
6. Recheck the printer settings in the application. NOTE: To use the parallel port for P21x printing you will have to set the printer port to LPT1 and not use the PPI_LPT1 port
7. Install the printer driver from the Installation Disc.
8. When one of the followings occurs, it is possible that the cable is broken or disconnected. 1) The gauge in the Print dialog box does not progress. 2) The “Out of Sheets” message appears repeatedly. Replace the cable with a new one. Are you using a printer selection switch or a printer buffer? With bi-directional interfaces, operation is sometimes unreliable when using printer switching boxes or printer buffers. If you are using a printer selection switching box or printer buffer, use one-way communication.
9. Do not use a cable that is longer than you need. The signals become more unstable as the cable gets longer.
10. Use the correct cartridges. The Foilfast printer will only accept Foilfast” premium foil cartridges.
11. Insert cartridges in the holders with the B side up.
12. When the foil in a cartridge has been spent, black and silver stripes will be visible on the ribbon. Install a new cartridge. After replacing the cartridge, printing will continue from where it left off.
13. Do you have enough hard disk space? The Foilfast requires work space on the hard disk when it prints. Keep enough free disk space to ensure that you can print without problems.
Problem #5: Printing is not working or is extremely slow
1. Make sure there is enough space on your hard disk. (The working space is released once printing is finished.)
2. Some applications have color printing enable/disable settings. Some applications do not support color printing. Read the manual for the application and check the color settings.
3. When very little memory is available for print processing, printing may take a long time or fail. Close as many applications as possible and try again.
4. Handling color images requires a lot of memory for the application and for the data. Sometimes there is insufficient memory left for printing. Make sure your computer has enough memory to print the size of images you are using.
5. General protection fault errors can occur when there is insufficient memory for color printing or when part of the hard disk has become corrupted. After decreasing the size of the print data or scanning the hard disk, try printing again.
6. The time required for printing can increase dramatically if the free space on the disk drive is extremely fragmented. Clean up your files and defragment the disk by periodically running a utility like DEFRAG, which comes with Windows.
Problem #6: Printer makes strange noises when the power is turned on, and the error lights blink
1. Has the carriage packing material been removed?
2. Has the packing tape on the case been removed?
3. Has a cartridge become dislodged from a cartridge holder? Open the front cover and make sure the cartridges are correctly installed.
Problem #7: Paper is not feeding correctly or not ejecting correctly from the sheet feeder
1. The cover material you are using may not be compatible with the Foilfast printer.
2. A curled sheet will cause sheet jams. The sheet should be curled the opposite way to flatten it out before it is used.
3. Sheets with folded or cut corners can cause problems if the sheet does not activate the position sensor and sheet length sensor properly.
4. Set the feed guide so that there is approximately 0.02″ between it and the sheets themselves.
5. The sheet feeder can hold up to 10 composition covers, 1 Clear Cover, or 1 Foilfast Title Sheet.
6. Composition covers should be between 16 – 18.5 points thick (.0016 – .00185 inches). Clear covers should be between 6.5 – 7.5 points thick (.0065 – .0075 inches). Covers that fall outside the bounds of these thickness ranges may work in the Foilfast printer, but Powis Parker does not recommend using them. Covers that fall substantially beyond these thickness ranges may damage the printer’s feeding mechanism and may void your warranty.
7. Make sure nothing is on the output tray as this can cause sheet jams.
8. Sheets must fanned at least once before they are loaded into the sheet feeder. If not, sheets may stick to one another, and cause multiple sheets to feed into the printer at one time, or other forms of misfeeding.
Caffeinated Content for WordPress
Use HP LaserJet 3500 Printer with HP Q2670A Toner Cartridge
Sunday 24 Jan 2010 by |
No Comments
Filed under: Hardware Tags: Base Model, Minimum System Requirement, Power Cable, Toner Cartridge, Usb Cable
yasirkalim asked:
HP LaserJet 3500 printer is a renowned printer due to its exceptional functionality. When you use this printer with remanufactured HP Q2670A toner cartridge, you really enjoy the output that their combination produces. Let’s now talk about this great printer.
The base model of this printer comes with a 64 MB of SDRAM. When you buy this printer, you receive several things with it. When you open the box, here is what you will find in it, of course, other than the printer itself: It will have a USB cable to connect the printer. You will also find a power cable to power the printer.
Other than receiving cables, you will get four print cartridges with it as well. You will also find a CD-ROM in the box which will contain your user guide. Yes, the entire manual will be in the CD-ROM. It will also have control panel overlay and getting started guide to help you get started without any problem.
The first thing you need to check after you receive your HP LaserJet 3500 printer is its Minimum System Requirement. The instructions will be printed on the outside of the box in which your printer was delivered. You may also see the instructions in the CD-ROM.
Let’s talk about its measurement now. Its height is 18.4 inches or 467mm. Its width is 19 inches or 483mm. Its depth is 17.6 inches or 447mm. You can now very well imagine how big this printer is. Not only its measurements are impressive, its output is impressive as well.
As a safety precaution, make sure you don’t lift up the printer all by yourself. At least two people should carry it to the prepared location. Also, remember that its USB connection and Power connection will be at the back.
Let’s now talk a little about remanufactured HP Q2670A toner cartridge. It’s a very affordable and top quality toner cartridge that can be easily used in both home and offices. Its ability to produce professional quality results at a very low price makes it an ideal choice for offices.
So, after you purchase your HP LaserJet 3500 Printer, simply visit an online printer cartridge store and order a remanufactured HP Q2670A toner cartridge. If you buy from a good and reliable store, they will deliver the toner to your doorstep without charging you any shipping cost. Thus, with this printer and toner, you enjoy professional printing at cheap rates.
About Brother All in One Printers and Model Reviews
Sunday 24 Jan 2010 by |
No Comments
Filed under: Hardware Tags: Fax Machine, Flatbed Scanner, Laser Technology, Printing Speed, Usb Devices
Jim Femeur asked:
If the number of functions a printer can do is all that you’re looking for in a printer, then Brother All In One printers is what you need. They have many makes to choose from. If you have something specific in mind, then go ahead and check the models and their respective features. This should help you better in finding the printer that you really want.
One of the popular models, the DCP-7020 Laser Printer is a monochrome printer with a printing speed of 20ppm. You can get up to 2400×600 dpi maximum resolution for black and white files. And if you have files stored in USB (Universal Serial Bus) devices, all you need to do is connect them to your all in one printer system and you’re good to go. You can have them printed in an instant!
This model is capable of printing up to 250 sheets in just one sitting. Yes that’s right, 250 sheets. A variety of papers can be loaded as well; these kinds of paper include glossy paper, inkjet paper, transparencies, and of course, plain paper. For the size modification of what you are going to print, you can reduce and enlarge them up to four times its original size. A flatbed scanner comes with the system, with 2400×600 dpi.
Another model is the Brother MFC-8860DN Laser Printer. Also a monochrome printer, just like the DCP-7020, it uses laser technology. It has a maximum resolution of 1200×1200 dpi for files printed in black and white. This is slightly faster than the DCP-7020 in terms of printing speed. It can go up to 30ppm compared to DCP-7020’s 20ppm. USB technology compatibility is also one of its features so it can easily print files stored in USB devices. Unlike the DC-7020, it has a monochrome LCD for the status panel. This printer system comes with a fax machine and a flatbed scanner. The fax machine has a whopping 33.6 bps (bits per second) fax speed. PC fax, automatic redial, distinctive ring tones, and scanning into memory are among the features supported by this fax machine. The following OS (operating systems) are compatible with this fax machine: Win XP & its earlier versions, Mac OS 9, and Mac OS X.
Other than the two Brother All In One printers mentioned above, there are other models available. You can find them in computer shops located near you. You can also search the web for other models not mentioned above. Other models include the MFC-665CW InkJet Printer, the MFC-240C InkJet Printer, and the MFC-846ON Printer.
Website content
Where to Go in San Diego When Your Printer Needs Repair
Sunday 17 Jan 2010 by |
No Comments
Filed under: Hardware Tags: Health Care Services, Loose Thread, Office Supplies, Orientation, Store Names
John C. Arkin asked:
Printers conk on us; that is what they do, sometimes. It could be for many, various reasons. Maybe there is something wrong with the circuitry that made it fail to power up or communicate with the printer properly.
Maybe we spilled something on it and we did not exactly do anything afterwards. When printers conk on us, the only thing to do is to get the printer repaired. Maybe there is a jam or a loose thread somewhere inside the machine. Maybe we used ink that is incompatible with it in our effort to save on printer ink cartridges.
If you live in San Diego, where should you go to get a repair job done for your printer? To find the place where you could take your printer for repairs, all you need to do is to open your local yellow pages, whether that big, bulky book that people sometimes subscribe to from the Yellow Pages Company, or its online versions and other directory listings on the Internet. There are probably dozens of stores that offer printer repair services in San Diego.
Here are a handful of store names that we pulled out from different online city searches for San Diego that give printer repair services to its clients.
PG Technical Services. A business that started out in 1990, PG Technical Services began as a company that offered health care services to residents of San Diego. They have long since diversified, and among the other ventures they have entered into are computer and network services, including printer repair.
San Diego Copiers and Office Products. This company is mainly into sales, specializing in copiers, computers, office supplies and office furniture. They claim to have around 30,000 products listed in their inventories from more than a hundred different manufacturers. But inasmuch as their orientation is sales, they also offer printer repair services for their clients, and they state that their response time is no more than four hours.
Printer Repair Depot. Located along Clairmont Mesa Boulevard, Printer Repair Depot is a shop that specializes in printer repairs and printer sales. They are reputed to give fast and quality service not just to San Diego residents but to the whole of South California.
Choosing a Printer Repair Shop
As much as possible, we should take our conked out printers to the service centers accredited by their manufacturers when they need repair. The reason for this is that accredited service centers are more than highly likely to have the genuine parts needed in the required printer repair.
In the absence of available accredited service centers, aside from the fact that their services can be more costly, there are other repair shops that we can take our printers to. Before we let the people in these repair shops touch our printers, we should consider not just the speed by which they can get repairs done, but also a guarantee that their repair jobs are done with high quality standards. This guarantee can come in a form of a warranty.
Caffeinated Content
How to Connect a Printer to a Dell 1501 Laptop
Saturday 16 Jan 2010 by |
No Comments
Filed under: Quality Copies Tags: Computing Machine, System Functionality, Usb Cord, Usb Printers, Wireless Mouse
Rainco asked:
The Dell Inspiron 1501 laptop is a solid performing, all around computing machine. This laptop has a 15.4″ screen, weighs less than 7 lbs., and still has all of the features that any business person or college student would need. With numerous ports and all system functionality, this computer can easily connect to a wireless mouse, scanner, as well as a printer. This article will outline the process to connect your existing printer to the Dell 1501 laptop.
Step 1: Make sure the computer is on and no other programs are running. Insert the CD that came with the printer and allow the printer software to add the proper print drivers to your computer. Connect the power cord for the printer to the printer and plug it in. Connect the printer cable to the printer. The printer cable can be one of two types: a USB cord or parallel cable.
Step 2: Connect the printer cable to the appropriate port on your laptop (either USB or parallel cable) and turn the printer on. Your Dell 1501 laptop will be loaded with a Microsoft Windows operating system and installing the printer will be “plug and play” in that additional driver installation will start automatically upon the computer recognizing the printer.
Step 3: After the drivers are added, click on “Start”, then “Control Panel”, and then “Printers and Faxes”. Select “Add printer” and follow the on-screen instructions. Close the “Add printer” window by clicking on the “X” in the right hand corner. Click “Start”, then “Control panel”, and then “Printers and Faxes”, then click on the printer icon for the printer you just added and select “Make default printer” from the drop down menu. Try printing something.
Tips & Warnings
Most USB printers are plug and play now, so if your printer is USB connected you can probably just connect the printer, download the drivers for your device from the manufacturer’s webpage and start printing.Do not always expect a particular printer to work with your laptop. Some older printers are not supported by the newer operating systems that can come on the Dell 1501.
Which Soho Printer? Part 1 of 3
Friday 15 Jan 2010 by |
No Comments
Filed under: Computers Tags: Color Printer, Network Feature, Office Staff, Photo Paper, Primary Colors
Tony Stockill asked:
Most people buying a new printer today are looking at a choice between a Laser Printer and an Inkjet Printer, although there are more types out there, more of this later.
SOHO refers to “Small Office Home Office”, an almost arbitrary category, since there are big overlaps with other “categories” of users at both ends of this definition.
For instance, a home user who is a hobbyist, with an interest in photography will want a color printer capable of printing on photo paper, with reasonable resolution, to match his digital SLR. The printer he would need certainly falls in the SOHO category.
Similarly, a large company with many employees might have a large office staff, all of whom would have a PC, and many of whom would need a printer. Many printers in this situation would be networked together, so that they could be controlled from a central point for job switching and maintenance purposes. The network feature is now standard in this type of printer, but they are the same printers which are used by the “small office” with perhaps 2 or 3 printers, shared by maybe 6 people.
Within the categories of “inkjet” and “laser” printers, there are many variations of features, which we can check out to decide what type is suitable for our purpose. Before we look at these two main categories, it is a good idea to look at what we will be printing. Most users, these days want to be able to print in color, so we will take a quick look at how the color is achieved.
The standard is that four colors of ink are held in the printer, commonly known as CMYK or Cyan, Magenta, Yellow and Black. Why K for black? It stands for “key” as the other colors are keyed to the black level. This system is known as the “Additive Process”, that is the primary colors are added to one another, in different proportions, to produce all the other colors. Black is theoretically not necessary, as the three primaries together should produce black, however, the density of colors required and the unknown “whiteness” of the paper make it much more economical to use black as well. Of course the majority of text is in black, so that is another good reason. Or to put it another way, it is cheaper, printer price is important, see http://printerprice.com where we discuss this further.
This color system is in contrast to the more familiar RGB, or Red Green Blue system used in your TV and computer monitor. RGB is a “Subtractive Process”, that is, the proportion of colors is altered to produce all the other colors by subtracting from or reducing, say the intensity of the red. Once again we can have a “black problem” early LCD screens had a problem completely removing all the light to produce black. This was noticeably poorer than contemporary plasma screens, but has now been fixed. Why this is important, is that in order to print out an image seen on your screen in RGB, the data must be converted to CMYK in order to supply the printer with the correct information. Maybe you’ve noticed the printout is not always the same as the image on the screen?
In part 2 we see how the two main types of printer handle this color system
Brother MFC 490CW Color Inkjet Multifunction Printer Review
Thursday 14 Jan 2010 by |
2 Comments
Filed under: Technology Tags: Brother Mfc, Card Slots, G3, Glossy Paper, Wireless Printer
Helen Moss asked:
The Brother MFC 490CW color inkjet multifunction printer is an all in one wireless printer ideal for personal use or even in a small office.
Now you can fax, copy and scan with the automatic 15-page document feature. There is no bulky handset with this all in one unit so your space won’t be wasted. Sturdy and relatively small, measuring at 14.8 x 15.4 x 7.1 inches and weighing 17.9 pounds this is great for those who are space limited.
The printer can be shared with a few users via wireless or wired (Ethernet) functions. A bright and large LCD helps you read the menus and options with ease. Whether you want to scan, fax or enhance your photos, the LCD display will help you get it right.
If you don’t have a computer, then don’t worry. You can print your photos directly through the media card slots or attach any PictBridge enabled camera to the printer and get going. No need for messy wires or computers.
Quality of as high as 6000 x 12000 dpi makes it easy to put your memories to paper while the print speed of up to 33 pages per minute in black and 27 pages per minute in color ensures that you don’t have to wait.
The Super G3 modem which is used for the fax function, works at the speed of 33.6Kbps. A four-ink cartridge system makes it easy to replace whichever color it is that has run out.
A standard paper tray for as many as 100 sheets and a photo bypass try for as many as 20 sheets sized 4 x 6 inches for glossy paper also comes standard with the device.
This appliance is also Energystar rated – something which is essential in this day and age and it’ll smartly shut itself off after it has not been used for a while. When a wireless document is sent, the printer wakes up quickly and gets back to work without any hassles.
Set up is fast and easy and all the software and hardware you need to get started comes in the box of your The Brother MFC 490CW color inkjet printer.


